
What is a background video element in Webflow?
A background video in Webflow is a dynamic visual element that plays behind other content on a webpage. It adds movement and interest to your design without interfering with text or other elements. You can easily set it up by:
- Dragging background video element to the canvas
- Upload your video
- Set up the settings such as autoplay, loop, play/pause buttons
Background videos can enhance user engagement but should be used thoughtfully to avoid distracting from your main content or slowing down your site.

How to play video on hover in Webflow?
Often, you or your client may want the option to play a video only when it's hovered over. This approach can be beneficial for several reasons:
- It ensures faster page loading times.
- It improves the overall user experience of your website.
- It can help reduce data usage for visitors.
Regardless of the motivation, setting up this hover-to-play functionality in Webflow is simple and straightforward. Here's how you can achieve it:
- Add background video and give it a custom class
- Adjust background video settings
- Copy-paste custom Javascript
Voila! That's it.
Just a notice: This won't work in preview mode. Make sure to publish your website before testing this out!
Step 1. Add background video element
The first step is to add a background video element to your Webflow canvas. When you do this, you'll be prompted to upload your video file. Ensure your video is under 30MB, as this is the maximum size Webflow allows. If your video exceeds this limit it's a good idea to optimize it with the help of the tool: CloudConvert, which can reduce your video's file size while maintaining quality.
Once your background video element is added, make sure to give it a class. This step is needed because we will target this class in our custom Javascript code.
Let's do the first step in order:
- Add background video element to the canvas
- Upload an optimized video below 30MB
- Give it a custom class (e.g .video-element)

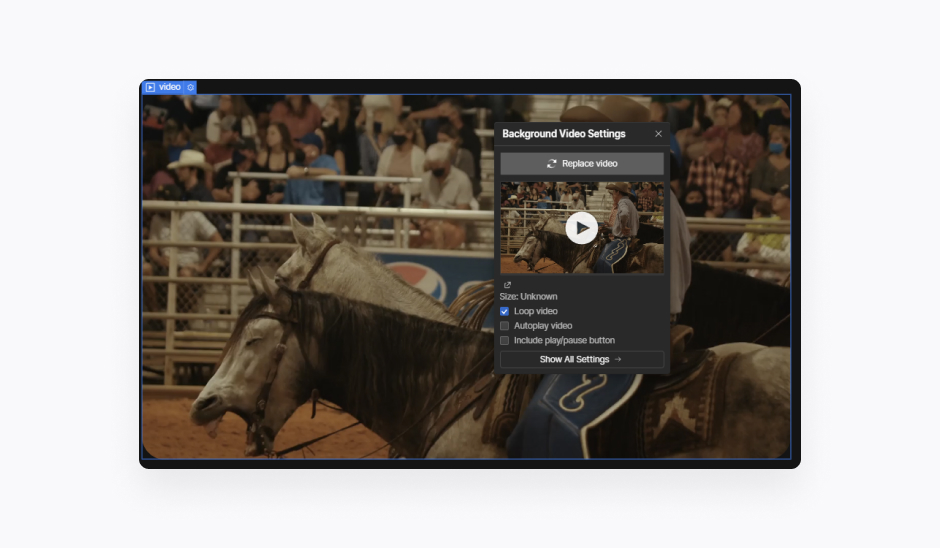
Step 2. Adjust background video settings
Adjusting the background video settings is crucial as by default it will autoplay automatically which is not what we want. We want the background video to not play automatically, but only on hover!
Let's do this easy step:
- Click on background video element and settings panel will pop-up
- Simply uncheck 'Autoplay video' and 'Include play/pause button'
It's always good practice to enable 'Loop video', but if you strictly need that off, make sure to uncheck that as well.

Step 3. Add a simple Javascript code
The last step is simple copy-paste of Javascript code and replacing the class name with your own (if you decide to use a different class name):
- Go to 'Pages' panel and go into the page settings
- Navigate to the bottom at 'before <body> tag
- Paste the Javascript code and replace class name with your own
This is the Javascript code you paste in your own project. As you can see, I use .video-element as class in my own code.
That's it! Now all you have to publish the page and it should work!

Conclusion
There you have it! Playing video on hover in Webflow is actually pretty simple as you can see. By using this solution, you will be able to improve UX and site speed with one simple Javascript line.

Related posts

The Ultimate Guide to Webflow Maintenance
Discover everything you need to know about Webflow maintenance in this ultimate guide. Learn essential tips, best practices, and strategies to keep your Webflow site running smoothly and efficiently.

Top 7 Webflow Integrations for SaaS Companies
Discover the top 7 Webflow integrations for SaaS: streamline workflows, automate tasks, and enhance user engagement to boost productivity and growth.

How to Style Select Field Dropdown in Webflow
Learn how to style and customize select dropdowns in Webflow forms effortlessly. This guide covers Webflow dropdown styling, CSS tips, and form design tricks to enhance UX and create visually stunning forms for your website.


Your search for Webflow developer ends here
To ensure highest quality of my service, I only work with limited amount of clients every month!